How to set up saw type PDG E-Cut 500
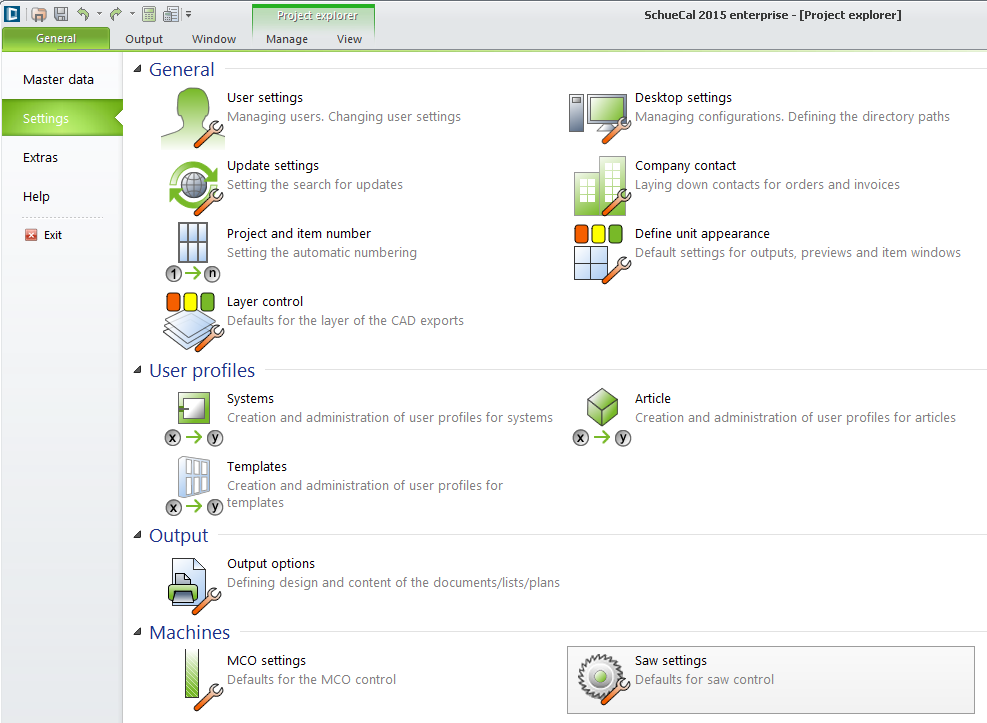
Go to General > Settings > Saw settings:
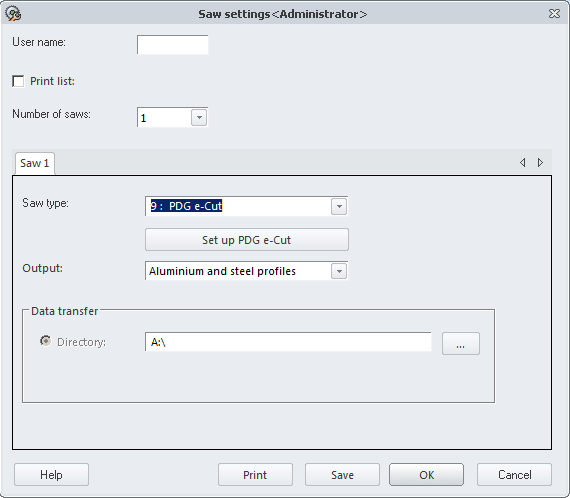
In saw settings windows set up:
By entering a number in this field you can modify the generation of the first two digits of the file name.
- If you leave the entry field empty, the file name is made up of the year and month, followed by a four-digit number. In addition, an extension is added as a description of the file type. E.g.: 01090000….
- If you enter a two-digit user number (e.g. 45), these numbers replace the first two (year) digits of the file name: instead of 0190000…., it will be 45090000….
Print list
After data has been transferred, a dialog box will be displayed listing all the files generated. You can preview a list of the output saw files or print it directly.
Check the check box if you want to preview the list of the generated files for the output saw files or print it directly.
A quantity of 1 is entered by default. In this case, you can enter the saw type in the Saw type 1 tab.
If necessary, you can define additional default settings for a second saw type.
To do this, select 2 from the drop-down list. A second tab is displayed in which you can make specifications for Saw type 2.
When you start the output of the saw file, specify the saws for which the output is to be carried out in the Output options for saw control file dialog box. The clamping positions set are taken into account for the relevant saw in the saw files.
For the Cutting optimization list and Print label list, specify in the respective Output options the saws for which an output is to be carried out.
By selecting a saw, you define the output format. The various saw types are offered for selection in the drop-down list. If the saw you are using is not offered, select the saw type with the same output format as that of your saw.
Choose PDG e-Cut

Output
Aluminum profiles
Button …
Here, you specify the standard directory into which the generated saw files are to be saved. In the Output options for saw control file dialog box, you can enter a different directory path for each output if required. Furthermore, you can also enter a different file name there.
Click Set up PDG e-Cut to set up additional settings, (if necessary only, default settings are ok in most of scenarios):

Barcode for Schüco Fabrication Data Center
If you check the check box, a barcode will be generated, which can be read on Schüco Fabrication Data Center and on CNC machine as well.
You have to specify, which kind of Barcode will be generated:
- Standard:
An arbitrarily long character string. - 7-3-4:
Project (7 characters), Item (3 characters), ongoing number profile (4 characters).
If you uncheck the check box, a barcode will be generated, which can be read only on CNC machine.
Display project name (restricted to 30 characters)
Check the check box, if the project name is to be output.
Max. 1000 profile section details
If you check the check box, after 1000 section details a new saw file will start.
As a standard the check box is checked. In saw file the codes for the rotations of the profiles are output in relation to the clamping position 0: 0.
If the check box is unchecked, the codes for the rotations of the profiles are output in relation to clamping positions that are set as default by the program.
Enter angles
Enter the maximum and minimum angles/swivel angles separately for the fixed and moving saw head.
Stationary saw head:
Angle from:
- In the Max field, enter the largest possible angle of the fixed saw head.
- In the up to: Min field, enter the smallest possible angle of the fixed saw head.
Movable saw head:
Angle from:
- In the Max field, enter the largest possible angle of the moving saw head.
- In the up to: Min field, enter the smallest possible angle of the moving saw head.
Enter the maximum possible cutting length of the saw in millimeters.
From basic depth … Rotate façade profile
- Enter the basic depth in millimeters from which façade profiles should be rotated through 90 degrees.
The clamping position pre-set by the program for the relevant profiles is automatically adjusted.
Restoring defaults
- If you click on the Default button, all fields are filled with the standard defaults for the saw type which is currently selected.